Are you struggling with transferring money from your QuickBooks Checking to your bank account? You’re not alone.
Many business owners and accountants find this process confusing and time-consuming. But what if I told you that there’s a way to streamline this task and make your financial life much easier? Imagine the peace of mind and clarity you’ll gain by mastering this essential skill.
In this guide, you’ll discover a step-by-step approach that demystifies the process, saving you both time and headaches. By the end, you’ll feel confident and empowered to handle your finances efficiently. Ready to unlock the secrets of seamless money transfers? Let’s dive in!

Setting Up Quickbooks Checking
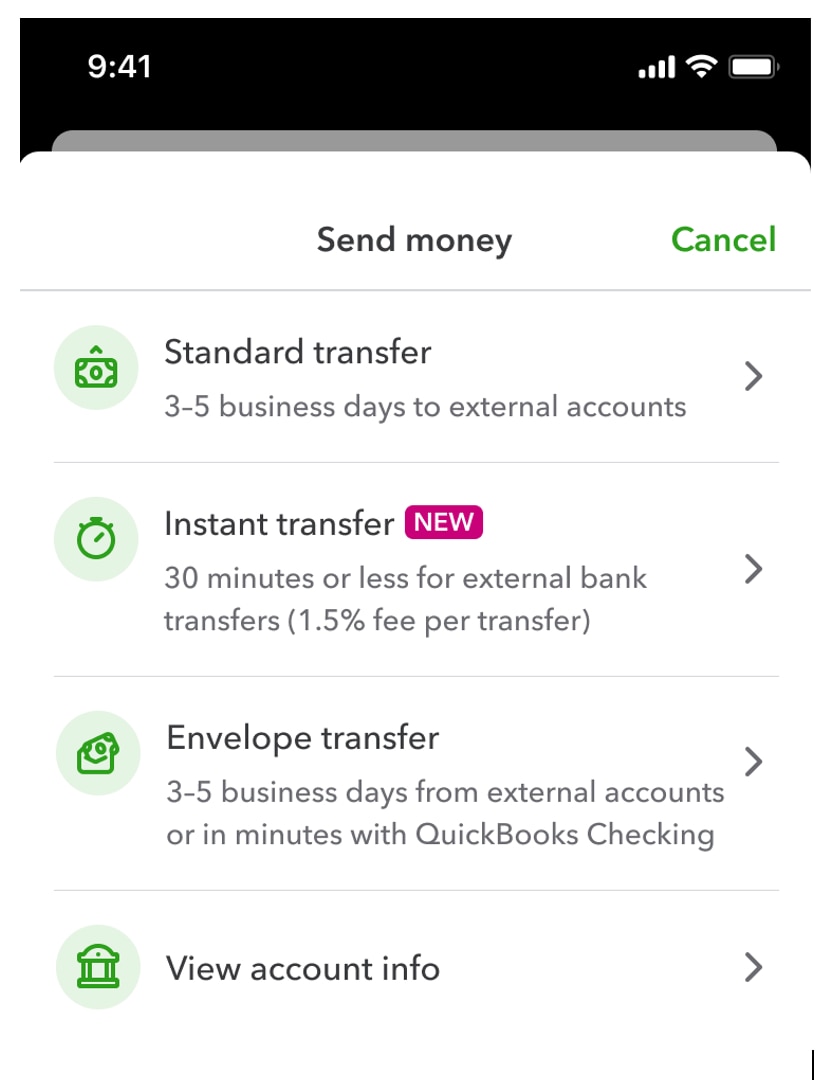
Easily transfer money from QuickBooks Checking to your bank account. Simply navigate to the ‘Transfer Funds’ option. Enter the amount you wish to transfer and confirm the details.
Setting up QuickBooks Checking is a straightforward process. This service offers a seamless way to manage finances. You can easily transfer money to your bank account. First, create your QuickBooks Checking account and then complete the verification process. Let’s explore these steps in detail.
Account Creation
Creating a QuickBooks Checking account is simple. Start by logging into QuickBooks. Navigate to the banking section. Select “Create a new account.” Fill in your details carefully. Make sure all information is accurate. Submit your application. Wait for confirmation.
Verification Process
After account creation, verification is crucial. QuickBooks will ask for identification. You might need to upload documents. These include a government-issued ID. Follow the instructions provided. Verification ensures your account’s security. Once verified, your account is ready. You can now transfer money easily.
Linking Bank Accounts
Transferring money from QuickBooks Checking to your bank account is straightforward. Start by linking your accounts within QuickBooks. Then, initiate the transfer by selecting the amount and confirming the details.
Linking your bank account to QuickBooks Checking is the first step towards seamless money transfers. Whether you’re a small business owner or managing personal finances, connecting accounts ensures you can move money efficiently and securely. Let’s dive into how to link your bank account successfully.
Choosing A Compatible Bank
Before linking, ensure your bank is compatible with QuickBooks. Most major banks are, but it’s worth checking the list of supported institutions. Imagine the frustration of setting everything up only to find your bank isn’t supported.
A quick online search or a call to your bank can prevent this. Check if your bank offers online banking services, as this is often a requirement. If you’re unsure, QuickBooks provides a handy tool for checking bank compatibility.
Connecting Accounts Securely
Security is paramount when linking financial accounts. Use a secure internet connection—avoid public Wi-Fi. Always double-check the URL for authenticity and look for the padlock icon indicating a secure site.
QuickBooks uses bank-grade encryption, but your vigilance is equally important. Enter your bank credentials carefully, and consider enabling two-factor authentication for an added layer of security. Have you ever thought about how much a simple misstep could cost you?
Once linked, QuickBooks will allow you to transfer money with ease. This connection not only saves time but also minimizes the chances of errors. Remember, a secure and compatible connection is the backbone of efficient money management.
Initiating A Transfer
Transferring money from QuickBooks Checking to your bank account is a straightforward process. But it can feel daunting if you’re unfamiliar with the steps involved. The key lies in understanding how to initiate a transfer successfully. This involves accessing the transfer feature and entering the correct transfer details. By mastering these steps, you can ensure a smooth transaction every time.
Accessing The Transfer Feature
Start by logging into your QuickBooks account. Once you’re in, navigate to the banking section. This is where all the financial magic happens. Look for the ‘Transfer Funds’ option—this is your gateway to moving money between accounts.
Have you ever wondered why QuickBooks makes this feature so accessible? It’s designed with your convenience in mind. With just a few clicks, you can initiate a transfer without the hassle of complex procedures.
Entering Transfer Details
Now comes the crucial part—entering the transfer details. You need to specify the amount you wish to transfer. Be precise; even a small mistake can lead to unwanted complications.
Select the accounts involved in the transfer. Ensure you choose QuickBooks Checking as the source account and your bank account as the destination. Double-check these details; accuracy is key.
Have you ever transferred money and realized you entered the wrong amount? Avoid this pitfall by reviewing your entries before confirming the transfer. Remember, vigilance saves you from potential headaches.
Initiating a transfer doesn’t need to be stressful or confusing. By understanding how to access the feature and accurately entering your transfer details, you can navigate QuickBooks like a pro. What tips do you have for ensuring smooth transactions? Share your thoughts and experiences in the comments below!
Reviewing Transfer Information
Transferring money from Quickbooks Checking to your bank account requires careful review. Thoroughly checking transfer details ensures smooth transactions. Accuracy is crucial in financial processes. Mistakes can lead to complications. So, always review the transfer information.
Checking For Accuracy
Verify the amount to be transferred. Ensure it matches your intended sum. Double-check the recipient’s bank details. A minor error can result in failed transactions. Confirm the bank account number. Cross-check the bank name. Review routing numbers for accuracy. These steps prevent mishaps.
Confirming Transfer Details
Check the date for the transfer. Confirm it aligns with your plans. Review the transfer type. Ensure it suits your needs. Confirm any fees associated. Understand the charges involved. Verify the transaction description. Make sure it clearly reflects the purpose. Confirming details helps avoid surprises.
Completing The Transaction
Completing a financial transaction can be daunting. But it doesn’t have to be. Especially when transferring money from QuickBooks Checking to your bank account. With a few clicks, you can ensure a smooth transfer. This guide will walk you through the essential steps. Let’s dive into the detailed process of completing this transaction seamlessly.
Submitting The Transfer
Start by logging into your QuickBooks account. Navigate to the ‘Banking’ tab. Choose ‘Transfer Funds’ from the options. Enter the amount you wish to transfer. Make sure the details match your bank account. Double-check for any errors. This step is crucial to avoid mistakes. Once confirmed, click ‘Submit’. This action initiates the transfer process.
Receiving Confirmation
After submitting, watch for a confirmation message. QuickBooks will send an email or notification. This confirms your transaction is underway. Keep this confirmation for your records. It provides a reference for future queries. Your bank might take a few days to process. Be patient as the transaction completes. Check your bank account for the transferred amount. Ensure the funds appear as expected.
Troubleshooting Common Issues
Transferring money from QuickBooks Checking to your bank account is usually smooth. Yet, sometimes unexpected issues can arise. Understanding how to troubleshoot these common problems ensures your transactions go through seamlessly.
Failed Transfers
One common issue is failed transfers. This can happen due to incorrect bank details. Double-check your bank account and routing numbers. Ensure they match what’s on your bank records. Also, confirm you have enough funds in QuickBooks Checking. Insufficient funds can lead to transfer failure.
Sometimes, a failed transfer might result from bank server problems. In this case, try the transfer again later. If it still fails, contact your bank for assistance. They can provide details on any server issues or account holds.
Delayed Transactions
Delayed transactions can be frustrating. They often occur due to processing times. Banks typically take one to three business days for transfers. Weekends and holidays can extend this period. Always plan your transfers ahead of important deadlines.
Another reason for delays might be security checks. Banks may hold transfers for verification. This is a safety measure against fraud. If delays persist, reach out to QuickBooks support. They can help identify any issues with your account settings.
Security Tips For Safe Transfers
Transferring money from Quickbooks Checking to your bank account is simple. Yet, ensuring your transfers are secure is crucial. Protecting your information and recognizing fraudulent activities is key. These security tips help keep your finances safe. Follow them closely and enjoy peace of mind.
Protecting Your Information
Your personal information is your first line of defense. Use strong passwords and change them regularly. A mix of numbers, symbols, and letters works best. Enable two-factor authentication. It adds an extra layer of security. Keep your software updated. Updates fix vulnerabilities and improve security.
Be cautious with sharing details. Only provide information on secure websites. Look for HTTPS in the URL. Avoid public Wi-Fi when handling transfers. Use a VPN for extra protection.
Recognizing Fraudulent Activities
Fraudulent activities can appear in many forms. Watch for suspicious emails or messages. They often contain links or attachments. Ignore and delete them. If something seems off, it might be a scam. Verify the sender’s identity before clicking.
Check your account statements regularly. Look for any unauthorized transactions. Contact your bank immediately if you notice anything unusual. Stay informed about common scams. Knowledge is power in preventing fraud.

Frequently Asked Questions
How Do I Initiate A Transfer From Quickbooks Checking?
To initiate a transfer from Quickbooks Checking, log into your Quickbooks account. Navigate to the ‘Banking’ section. Select ‘Transfer Funds. ‘ Choose Quickbooks Checking as the source and your bank account as the destination. Enter the amount and confirm the transfer.
Are There Fees For Transferring Money?
Transferring money from Quickbooks Checking to a bank account typically incurs no fees. However, always check the terms and conditions or consult with Quickbooks support for any specific fees related to your account type or transaction.
How Long Do Transfers Usually Take?
Transfers from Quickbooks Checking to your bank account usually take 1-2 business days. However, the exact time may vary based on your bank’s processing times and other factors. Always check with both Quickbooks and your bank for specific details.
Can I Transfer Money Using The Quickbooks Mobile App?
Yes, you can transfer money using the Quickbooks mobile app. Simply log into the app, navigate to the ‘Banking’ section, and follow the same steps as on the desktop version. Ensure your app is updated for the best experience.
Conclusion
Transferring money from QuickBooks Checking is simple. You can easily complete the process online. Follow the steps carefully. Verify all details before confirming the transfer. Always check for any fees involved. Keep track of your transactions. This ensures your funds move safely.
Remember to update your bank records. Maintaining accurate records helps with future transfers. Regularly review your account for any discrepancies. This keeps your finances organized. A smooth transfer process saves time. It also reduces stress. Now you can confidently manage your business funds.